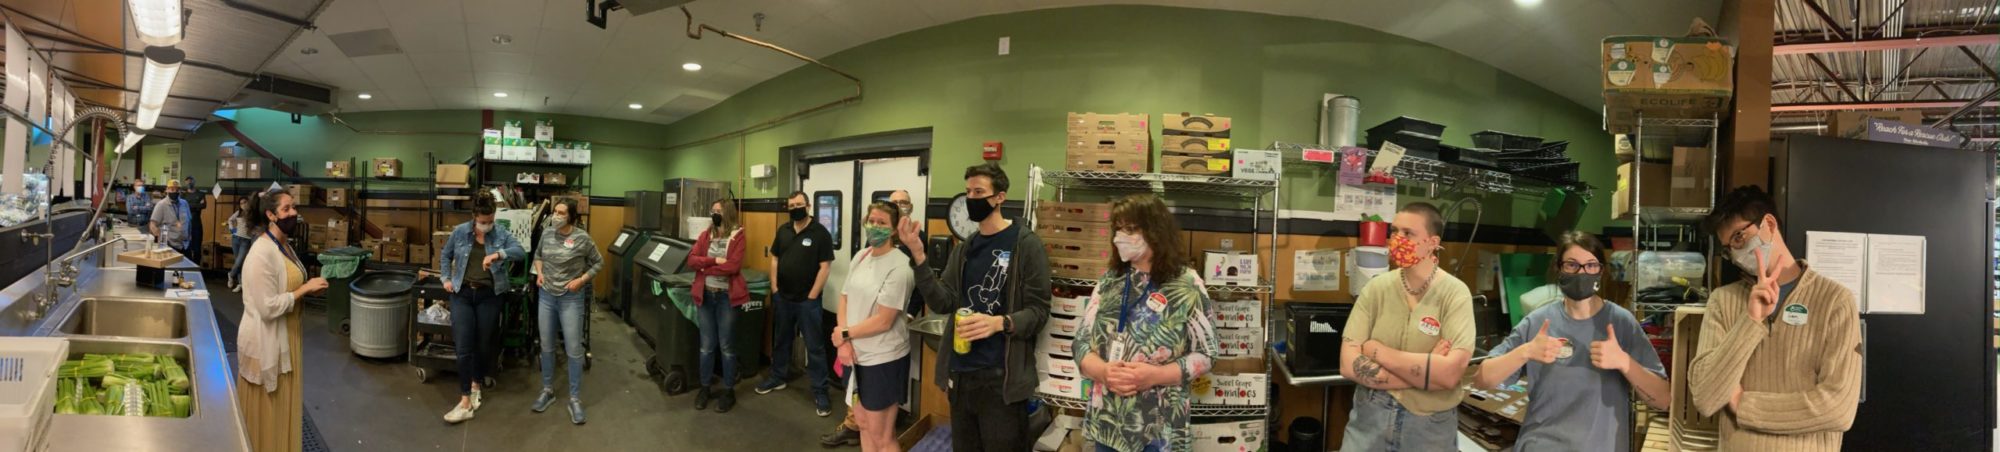
Come Learn With Us! Why should you attend Education?
Our community needs Heroes! This is our chance to enhance our teams knowledge on our products and bring our team together to share our love for food and product knowledge! Explore produce, spices, herbs, wellness secrets and more in our staff education classes! Eat, Drink, Laugh, and Learn your way to being a true Healthy Living Hero!
Empower Ourselves, Empower our Staff, Empower our Community! Who ever said learning can't be fun?
Staff Education was built for YOU! Use this time to learn more about our products and your coworkers to develop a community within our stores. Want to know more about a new dish? Ask a Chef! Want to know more about local vegetables? Ask your produce supervisor! We want to empower you to be comfortable to ask the right questions, as much as we want to empower you to have the right answers!
Essential Behaviors of Healthy Living
This post might Sting! Ever hear about Thistles?
 The Artichoke…
Ever wonder why the word “Choke” is in an artichoke? Well, besides the small spines that line the purple and green leaves of this wonderful bud, and the cough worthy bitterness, it may be the hairy center above the “heart” is actually indigestible and can cause choking!
Well then? What does this power packed vegetable have to offer? Low in fat, high in fiber, vitamins and minerals; Artichokes have been known to help with weight loss for a very long time. They are tender when cooked well and quite delicious. Pair with Mediterranean flavors… think garlic, lemon, oregano!
The best part is that you can find Artichokes in our Cafe’s latest ATO (Assemble to order) Salads!
Follow along here:
“Artichaut” White Bean Salad with Spring Radish, Roasted Artichokes and French Lemon Vinaigrette
French Lemon Vinaigrette
Total Yield: 16 oz
Components
Lemons juiced 2 each
Shallot minced 0.5 each
Honey 1 tbsp
Vinegar, White Balsamic 1/4 cup
Oil, Olive 1 1/2 cup
Herb, Parsley Flat Leaf 1 oz
Herb, Oregano 1 oz
Salt, Kosher TO TASTE
Instructions
1. Puree supremed lemon, honey, vinegar until smooth.
2. Slowly stream in olive oil to emulsify.
3. remove from blender and keep cool.
4. Brunoise shallot and chop parsley and oregano.
5. Stir in shallot and herbs and season to taste with salt.
Roasted Artichokes Hearts
Yield: 3 lb
Components
Artichoke, Hearts 3 lb
Oil, Olive 3 oz
Garlic, Peeled chopped 5 clove
Instructions
1. Dry the artichokes with paper towels
2. Toss the artichokes with olive oil and garlic
3. Roast at 375F -at side down for 15 minutes until they are brown and crispy.
Welcome to the World of Beets #BeetsbyCafe 
 This week’s focus is on a root vegetable most of you are likely familiar with… BEETS!
The origin of the beetroot goes way, way back before written history… crazy, right? Known to have been grown in the gardens of Babylon, in Ancient Greece and Rome, Northern Africa, and across Europe, beets were originally cultivated for their edible green leaves, similar in flavor to chard. Surprisingly they were also cultivated for their medicinal properties. Ancient Romans revered beets for their supposed aphrodisiac qualities, and Greek goddess Aphrodite would eat beets to enhance her appeal.
Nowadays it’s the bulbous root that takes center stage. The modern, round red root vegetable we’re familiar with developed from a carrot-shaped variety in the 16th and 17th centuries, when it became a staple in Eastern European cuisine in dishes such as borscht. Its popularity further spread worldwide after French chefs realized their potential in the 18th century. It seems like the whole world has grown to be enamored with beets (except for the Obamas, who asked to not have them planted in their White House vegetable garden… a good example of their polarizing earthiness!)
The beet season in North America runs from June to October, though they can be easily found year-round in most markets. Beets are known to have an earthy and mineral flavor profile, which turns to a natural sweetness when cooked. Due to this natural sweetness, beets can also be used to extract sugar from, in a process designed by German chemist Andreas Sigismund Marggraf back in 1747. Beet sugar production requires 4 times less water than sugar cane production, making it a more sustainable option as well as more accessible in more arid countries.
Not only are beets a great source of vitamins A, B, and C, they are a good source of calcium, iron, magnesium, potassium, manganese and fiber. Betaine, an important nutrient made from the B-complex vitamin choline, is the pigment that gives beetroot its deep rich color. Betaines also have powerful anti-oxidants and inflammatory properties- studies have shown beets can lower inflammation and pain in patients with ailments like osteoporosis and arthritis. Also containing amino-acid tryptophan, beets can be a powerhouse when it comes to boosting your mood. Beets are also extremely high in nitrates; when nitrates are converted by our bodies into nitric oxide, which helps to relax and dilate our blood vessels, our blood flow improves and blood pressure lowers. Thank you nature!
While the red beet is most common, there are several varieties with different flavor and color profiles, eaten both raw and cooked. Chioggia beets are those candy-cane striped beauties you may have cut into, while golden beets have a golden yellow hue. Today we will be cooking with red and golden beets!
This week’s recipes are courtesy of Mike Daley, our new Café chef: Pickled Beets and Mustard Seeds in a Roasted Beet Vinaigrette!
Pickled Golden Beets
2 cups gold beets, peeled and small diced
2 cups apple cider vinegar
1 cup sugar
1 cup water
Place the cut beets in a small plastic container. Combine the water, sugar and vinegar and bring to a boil. Pour the hot liquid over the beets. Cover and let cool in the liquid.
Pickled Mustard Seeds
1/2 cup mixed mustard seeds
1/2 cup white balsamic vinegar
1/4 cup sugar
Combine everything in a pot, bring to a boil, reduce to simmer, let cook 15 min. Pour into a plastic container and let cool.
Roasted Beet Vinaigrette
1 cup roasted red beets
1 cup red wine vinegar
2 cup canola oil
Kosher salt
Combine the beets and vinegar in a blender cup. Blend on high for 1 minute. Slowly begin adding the canola oil in a gentle stream until fully emulsified. Season with salt.
Top pickled beets and mustard seeds with vinaigrette and enjoy!
What's a Brassica you ask?!?!?!
 Eating with the seasons has long been a way of life in many cultures. It’s easy to find non-seasonal produce year-round, with the number of large chain supermarkets across the US, but eating in-season is much more beneficial. Not only does seasonal produce taste better, but it also supports local farmers, and is richer in nutrients and overall health benefits.
Friday’s demo was a lesson on a vegetable group known for year-round availability. Some food groups grow all year, yet seasonality still has an effect on the flavor and freshness- Brassicas are one of these. Brassicas, the most diverse genus of vegetables, are a part of the mustard family Brassicaceae (formerly known as the cruciferous family Cruciferae). Powerhouses of the vegetable kingdom, brassicas are among the most commonly cultivated and nutritious vegetables in the world. Full of vitamin C, vitamin K, beta-carotene, and glucosinolates, brassica vegetables are also a great source of soluble fiber. The intake of brassicas has also been long associated with a decreased risk for developing cardiovascular diseases and different types of cancer, particularly in the digestive tract, liver, lung, and breast. Broccoli, cauliflower, collard greens, and cabbage are only a few members of this amazing family.
As far as taste goes, brassicas are highly versatile and can be prepared in a number of ways. While cooking tends to mellow out the bitterness, the range of colors and textures lend themselves well to be eaten raw. You might have had an aversion to brussels sprouts as a kid… this is because Brassica vegetables are full of compounds isothiocyanates, thiocyanates, and nitrites, which give them their characteristic pungent aroma and bitter taste. As the sun comes out and the temperature warms up, fresh spring vegetable salads are a great way to include some more brassicas in your diet!
The new spring ATO salad features three common members of the Brassica family: Cauliflower, broccoli, and broccoli rabe.
Cauliflower
Cauliflower is best known for its edible white head—which can be seared in thick-cut steaks, caramelized in the oven, or pureed into savory, creamy soups—but its core stems and leaves cook up nicely over high heat, too, drawing out a sweetness reminiscent of a cooked turnip. Quick-boiled cauliflower rice has recently become a favorite low-carb staple to use in place of high-carb grains like rice and pasta.
Broccoli
Broccoli is an edible bright green or purple plant with a flowering head, sturdy stalk, and nutrient-dense leaves. Broccoli can be eaten in its entirety and prepared in a myriad of ways: raw, roasted, steamed, sautéed, and even battered and fried. Enjoy it chopped up in a salad, steamed for a quick snack, puréed into a pasta sauce, roasted and served over lentils, rice, quinoa, or other grains with a drizzle of olive oil.
Broccoli Rabe
Broccoli Rabe, contrary to what you might think, is not broccoli- it’s actually more closely related to a turnip! Though its sharp bitterness can be polarizing, it is an asset in rich and heavy dishes as the bitterness lends itself well to cut through fats and proteins. Many typical Italian dishes utilize it (ever had pasta with sausage and broccoli rabe?)
Check out the recipe for Brassica Salad on our recipe rack!
Ganoush and Fattoush! Celebrating the Middle-East!
This week’s culinary adventure takes us to the Middle East through the use of Eggplants and Cubanelle Peppers
Ever get bored of hummus?
Next time you’re craving a creamy dip for your pita, why not try baba ghanoush instead? Baba Ghanoush is a creamy eggplant dish believed to have originated in Levant and Lebanese cuisine, meaning “pampered papa” in Arabic. While native to the Middle East, its popularity has spread worldwide (Brazil, India, Mediterranean countries, and the US to name a few.) It holds particular popularity in India, where the eggplant originates from.
And if you need a way to use up all that leftover pita, Fattoush is another Middle Eastern staple to try your hand at! Said to have originated in Northern Lebanon, Fattoush is a bread salad, typically made with leftover pita and whatever vegetable scraps Lebanese farmers had on hand, such as cucumbers, tomatoes, purslane leaves (or lettuce), radish, green onions, and fresh herbs like parsley and mint. A simple vinaigrette and sumac spice at the end give Fattoush its distinctly complex flavor.
Here’s our Café’s own take on Baba Ghanoush and Fattoush!
Baba Ghanoush
Italian Eggplant: 4 medium sized
Garlic: 1 clove
Olive oil: 1 oz/ 2 tbsp
Juice of 1 lemon
Tahini: 1.5 oz/ 3 tbsp
Yogurt: 4 oz/ ¼ cup
Pomegranate Molasses: 0.5 oz/ 1 tbsp
DIRECTIONS
Char the eggplant on all sides heavily until the skin begins to separate; the flesh should be extremely soft. Peel the burnt skin, do your best to remove seeds. Combine flesh with the rest of ingredients and blend until smooth. Enjoy drizzled with olive oil and spices with warm pita!
Fattoush
Jalapeno: 3 charred, deseeded, and peeled
Cubanelle Peppers: 2 charred, deseeded, and peeled
Radishes: 6 sliced
English cucumber: ½ sliced
Mint: ¼ cup picked
Oregano: 1 oz/ 2 tbsp
Olive Oil: 4 oz/ ¼ cup
Lemon juice: 4 oz/ ¼ cup
Sumac: 1 tsp
Dill: 1 oz/ 2 tbsp, picked
Parsley: 1 oz/ 2 tbsp
Skin of 2 preserved lemons, sliced thin
Pita bread: one package
DIRECTIONS
Char peppers until the skin blisters. Deseed, peel, and slice thinly. Tear up pita bread and toss in olive oil, then bake at 400 degrees until crispy. While warm, add the pita and the rest of the ingredients into a bowl. Toss until coated and serve it warm!
Drink to Your Health!
This week’s education session, led by our wellness buyer Hillary Lindsey, was focused on three immune-boosting and stress-relieving herbs. While we’ve reached the end of winter and the pandemic seems to be turning a corner, we could still use the power of natural and medicinal herbs to bolster our health and make sure we’re in good spirits to enjoy the coming summer!
ASHWAGANDHA
Ashwagandha (Withania somnifera) is a root that has been used in Ayurvedic medicine for thousands of years. You’ve probably seen the name in trendy wellness drinks or supplements, as it has become widely-acclaimed for its numerous health and wellness benefits. Studies have shown it to be extremely effective adaptogen for stress management. It works by lowering cortisol levels in the body, which in turn leads to stress reduction- something we could all benefit from during these trying times. Ashwagandha also supports healthy immune, neurological, endocrine, and reproductive systems. Is there anything this powerful plant can’t do?!
Ashwagandha roughly translates to “the smell and strength of a horse” in Sanskrit, the ancient language of Ayurvedic tradition. Due to its antibacterial properties, it was also traditionally used in Africa and Native America to treat infections.
Ashwagandha can be consumed in supplement, powder or tea form. For tea, steep 4-6 minutes.
CHAGA
Chaga (Inonotus obliquus) is a mushroom long used in traditional and folk medicine, notably in Russia, with the name originating from the Russian word for “fungus.” Chaga is known by many names internationally- it’s called kreftkjuke in Norway, translating to “cancer fungus.” This is because Chaga has numerous health benefits, including preventing or slowing the progression of cancer. Chaga contains incredibly high amounts of the pigment and potent antioxidant Melanin- some say that in addition to the natural amounts of melanin found in our skin, the melanin in Chaga can further aid in protection again sun damage in skin. Other benefits include supporting a healthy immune response, digestion, blood sugar, and liver function (vit. D, iron, magnesium.)
The conk (woody growth) is mainly found on birch trees and grows throughout the Northeast. It has an orange interior, and a charred-appearing exterior due to the high levels of melanin.
Chaga is best consumed in pill, powder, or tea form. For a delicious brew, steep 10-30 minutes for tea, and up to 3 hours for hot water extraction.
ROSEHIPS
Rosehips (Rosa canina) are red, round and berry-like in appearance, and are the fruit of the rose plant harvested in early Autumn. Most of us know of the importance of Vitamin C in our diets, consuming it in the form of oranges, or in those little vitamin powder packets. Most don’t know, however, that rose hips contain 60 times the amount of vitamin C in an orange, and that two tablespoons of rose hips equates to 76% of your daily recommended intake of vitamin C- crazy! High levels of vitamin C, antioxidants, and quercetin present in rosehips help to boost the immune system and oil production of the skin, stimulate collagen production and moisture content, and help protect again sun damage while healing impurities.
Rosehips have a naturally tart flavor. For tea, steep 10-15 minutes. Try sweetening the tea with a local honey for even greater health benefits!
Green Power Powders!
 Matcha 抹茶
Matcha tea has been consumed in both Japan and China for centuries and has been a ceremonial drink within Zen Buddhism and across Japanese culture. Specific blends are created by grand tea masters and become known as konomi.
There are 3 grades of matcha: ceremonial, premium, and culinary
Matcha is made from ground green tea leaves, traditionally stone-ground, that have been shade-grown for 3-4 weeks, a process that increases the level of both caffeine and theanine (an amino acid that promotes the production of serotonin, dopamine, GABA, and glycine in the brain and provides an umani flavor).
The powder is blended into water or milk traditionally with a bamboo whisk, called a chasen.
Spirulina A. Platensis
Spirulina is a dried biomass of a blue-green algae that is believed to be one of the oldest life forms on planet Earth.
This algae was first used as a food source by the Aztecs and Mesoamericans, primarily from Lake Texcoco in Mexico and was called tecuitlatl.
Being high in protein, it was used by the Aztecs to enhance endurance and maintain stamina during marathon runs. This plant-based protein, phycocyanin, also antioxidant and anti-inflammatory properties.
Spirulina is also an excellent source of B1, B2, B3, Magnesium, Copper, Iron, and much more!
The sustainability and nutrient levels of spirulina have put this algae at the forefront of discussions on addressing food security and malnutrition for both humans and animals.
Moringa (M. oleifera)
Moringa is a tree native to India, also known as drumstick tree due to the long and slender seed pods.
The leaves, seed pods, bark, flowers, sap, and roots are all used in traditional herbal medicine in India. Moringa leaves in particular are high in Protein, Vitamin A, B2, B6, C, Iron, Calcium, and Magnesium.
Dried leaves are ground into a powder and also added to capsules as a dietary supplement. With its elevated levels of antioxidants, including quercetin and chlorogenic acid, the leaf extract can be used as a natural preservative to prevent oxidation in food and has been shown to protect against arsenic toxicity. The leaves have also been used to treat malnutrition. The seeds have even been used as a nontoxic way to filter water in both Asia and Africa.
Initial studies have shown the use of moringa to support healthy blood sugar and cholesterol levels.
What do you know about Green Papaya?
 Papaya Salad- “Som Tum”
Although Traditional in the regions of Thailand, Vietnam, Laos and Cambodia, it is believed the true origins began in Laos but were transferred to Thailand through the northern region called Isaan which lives on the Laostion border. The original name for the dish was “Bak” which translates to Papaya and “hoong” which translates to pounded. This is because of the excessive use of the Mortar and Pestle used to make the delicious chili and peanut paste used to dress the salad.
Part of what makes this dish so special is the use of Green Papaya (The unripe papaya fruit). This ingredient is fairly specific to this part of the world, a sub tropical fruit known for its sweet orange flesh once ripe, the green papaya is crispy, crunchy, light and filled with water. I find it similar to the texture of watermelon rind with its own distinct flavor. The green Papaya or Pawpaw is quite delicious, but actually not very nutrient dense. It provides some vitamin c and folate, but especially the unripe green papaya generally has the lowest levels of all of these. Once ripe it can either turn orange or red, has a mild musty sweet taste and sometimes can have the funk of some cheeses.
Papaya Salad Vinaigrette
0.5 oz Garlic, Peeled
2.5oz Serrano Chili
1oz Granulated Sugar
0.75oz fish sauce
2oz lime juice
0.25oz korean chili flake
2.5oz Shrimp Shells
2oz Shrimp oil
2.5oz toasted peanut
- Fill a small pot with Canola oil and bring up to 400F. Put in shrimp shells from cleaning shrimp and fry deeply until crispy all the way through. Strain and let cool fully before moving on.
- Place the Fried Shrimp Shells in a robot coupe and turn on until a powder forms. Add the rest of your ingredients and blend into a chunky paste. Cool and reserve.
Papaya Salad
6oz Green Papaya Shaved
2oz Cantaloupe Shaved
0.75oz Peanuts
1oz Roma Tomato
1oz Papaya Salad Vinaigrette
1 Squeeze Fresh Lime Juice
- Carefully toss together all of your ingredients. Check seasoning with salt and lime juice!
- Serve and Enjoy!

On bread...to yeast or to naturally yeast

A history of bread…
Through the pandemic, a lot of us learned the many varieties of bread and how to make them…with yeast or not (when every single grocery store in town ran out of it). There are two very basic but complex breads that we all enjoy, sourdough and white bread and we learned all about them and their derivations.
Sourdough bread dates all the way back to ancient Egypt and was discovered on accident! Wheat was domesticated in the fertile crescent (which is where this delicious loaf hails) and the wild yeast found in this area gave the bread a more airy texture. Sourdough is easier to digest due to the fermentation from the naturally occurring lactobacilli (bacteria) and yeast. Yeast helps the bread rise and the lactobacilli gives it the “sour” taste from the lactic acid by product. Starters for sourdough need a stable microbiome and pH between 4.4-4.6 and need a stable culture between the bacteria and yeast. People have passed starters down for generations. Great Harvest Bakery has been using the same starter for 70 years! Some popular forms of sourdough are: Amish Friendship bread, Danish Rye (almost always leavened with sourdough because rye does not contain enough gluten for baker’s yeast), German Pumpernickel and Ethiopian Injera.
White bread always uses a bakers yeast as a leavening agent. The first known white bread was harvested from yeast used in beer making, which gave the bread a sweeter taste. When brewers began using bottom fermenting yeast instead of top fermenting yeast (bottom fermenting yeasts work better at a lower temperature and produce CO2 slower), bakers switched to a different yeast. Pure strains of yeast were cultured and today we use Saccharomyces cerevisiae. The cultured yeast reacts with gluten to make the dough rise. Often times baker’s will use bread enhancers or wheat gluten to amplify the effects. Some different kinds of yeast used today are: active dry, cream, compressed, instant and rapid rise. Active dry yeast is most common in commercial use. It stores well and is encapsulated by dry, dead cells and must be proofed before using to “activate”. To proof; water, flour and sugar is added and the yeast then feeds on the sugar. Some popular forms of white bread are: Sandwich bread, bagels, baguettes, rolls.
Did you ever think bread could be so complex?!
Nicoise Salad, Originates from Nice, also tastes Nice.
 Ahh the classic. A traditional “poor mans” salad composed of tuna, tomatoes, nicoise olives, and hardboiled eggs. As it gained popularity throughout France, it became a well known dish of Nice, where the later additions of green beans, boiled potatoes, shallots and red peppers were considered traditional.
As much of this dish is rooted in tradition, you will often find old French chefs arguing about what is really “traditional”. Some say the vegetables should always be raw, some say never to use vinegar, others say the vegetables should only be seasoned by rubbing raw garlic along the bowl it is served in. Needless to say, every variation is quite delicious and plays on the classic flavors of France. (Honestly, with how passionate an old French chef can be, I wouldn’t doubt a few scraps starting over this very argument.)
This week, Chef Mike from our Cafe at Healthy Living is putting his own HLFresh spin on this dish by keeping it truly seasonal. We substituted the green beans for peas, added capers and red peppers and serve it over “untraditional” mesclun greens to give the salad more body. Rather than rubbing the container with Garlic. We make a roasted garlic vinaigrette which seasons the potatoes and most of the dish. We finish the whole tasty treat with a raw seared portion of yellowfin tuna. Its fresh, its seasonal, and it is extremely healthy!
Our Chefs want to share the vinaigrette recipe so you can make a spring “Melange” of these vegetables at home! We want to see what you would put in your “Traditional” Nicoise Salad.
Roasted Garlic Vinaigrette Yield: 44oz
14oz Roasted Garlic
2oz Dijon Mustard
14oz White Balsamic Vinegar
1lb Sunflower Seed Oil
2oz Parsley, Flat Leaf
To taste Kosher Salt
Procedure:
- Combine dijon mustard, vinegar and roasted garlic in a blender
- Blend together and slowly drizzle in oil until emulsified
- Add parsley at the end and blend until smooth
- Season with Salt

The Wonderful World of Ginger!
 Did you know that we have over 200 different ginger items in the store?! Ginger root (or rhizome if you want to get technical) is a tropical flowering plant that is native to the Southeast Asia and was first domesticated by Austronesian people in Taiwan around 3000 BCE! Confucius wrote about ginger saying we should eat ginger with every meal. The root has been used medicinally and as a culinary ingredient for thousands of years. It helps with nausea, upset stomach, arthritis and inflammation and is high in antioxidants.
A tip when prepping ginger root: use a spoon to peel the skin off!
Green, Purple and White...Colors of the Asparagus Rainbow
How much do you know about asparagus? 
This week we learned that asparagus is its own rainbow (in the fact that is its own class called “Asparagalus”). Originally, asparagus was thought to be in the lily and allium family but it is just too special and must be in a class of its own. It was a wild plant and is native to our wonderful region in the early summer. Asparagus shoots are quite small and leafy and are jam packed with vitamin B, calcium, fiber, beta carotene, protein and so much more!
White asparagus is covered with dirt which kills photosynthesis which creates chlorophyll. It is less likely to dry out which leaves a succulent snappy texture and is very common in Norway and Germany, where it originated.
Our café offers an asparagus dish called:
Asparagus Salad with Roasted Garlic Aioli
- 5lb. asparagus, cleaned
- 1oz. parsley, chopped
- 1oz. lemon juice
- 9oz red onion sliced
- 8oz. roasted garlic vinaigrette
Take cleaned asparagus, coat with olive oil and grill over high heat until slightly charred but still green and tender. Cut the asparagus into bite size pieces and toss with the rest of the ingredients.
ENJOY!
How do you Sausage?

The 3 meat ingredients make up the batch weight. These ingredients make up what represents 100% of the batch. Each of the seasonings and other ingredients in the recipe, are measured as a percentage by weight in relation to the total batch weight.
Pork Shoulder 62%
Smoked Bacon 17%
Back Fat 21%
Kosher Salt 1.15%
Black Pepper 0.3%
Smoked Pimenton 4.8%
Garlic 1.15%
Cayenne Pepper 0.6%
Cherry Powder 0.4%
Red Wine 9.3%
Milk Powder 3.2%
This week, Chef Derek from Williston went all out and showed us his passion for sausage. Generally when someone has the word sausage tattooed across their knuckles, you can trust them!
Follow along with these steps, and you can trust us that you will make the most delicious sausage you have ever had!
The Technique!
1. Butchering- in this step, the meat and fat are cut from the whole animal and broken down into Primals, sub-primals, trim, and scrap. Sausage needs to have a blend of lean meat (shoulder, rounds, butts, etc.) and fat (typically back fat will be used due to its texture). Because of this, sausage making is a great way to use the whole animal and ensure that as little as possible goes to waste.
2. Batching- In this step a ratio will be prepared of lean meat to fat (by weight). This should always be done by weight and by percentage. Weight is the most exact measurement used in a kitchen, and is paramount to consistency. This chorizo recipe is 72/38 meaning it is 72% lean meat (in this case pork shoulder) and 38% fat (pork fatback and bacon). The rest of the recipe is recorded in percentages as well, this is so you can adjust the recipe for different batch sizes without having to ballpark cups, Tablespoons, etc. For example. The salt in the chorizo recipe is 1.15% of the total weight of the lean and fat combined. So, if we make it easy and say we are making a 1000g batch of this chorizo we would find what 1.15% of 1000 (1000 x .0115) to see that we would need 11.5g of salt for that size batch. Every ingredient that is not part of the “meat weight” will have its percentage work off the combined total weight of the meat.
3. Curing- In this step, the spice mixture that we have weighed out in the batching process is spread evenly on the cubed-up meat and fat. This helps by pulling some water weight out of the meat to help concentrate flavor, as well as introduce new flavors that can develop overnight before grinding. This step can help achieve a better texture by removing excess water from the equation which can cause issues down the line in the stuffing and cooking process.
4. Grinding- For this step it is imperative to work QUICK, CLEAN, and COLD. The cured meat and fat can be placed in the freezer for about 15 minutes to get as cold as possible without freezing. The same is done with all of the parts for the meat grinder (horn, auger, dies, blades, etc..) and a bowl or other metal non-reactive vessel should be placed over ice to receive the fresh grind. The main reason for the need to be quick, clean, and cold aside from the obvious food safety aspect is that it is very important to make sure everything grinds and holds shape and texture and does not “smear”. Smearing is something that can happen when grinding meat if the meat is not cleaned properly and contains sinew or other connective tissue, if the grinder becomes clogged for any reason, or if the meat or fat is too warm. It will cause the grinder to produce a smooth textured grind instead of the coarse grind which is what we want. Once all parts and meat mix are cold, you can get grinding. Alternate between dropping in pieces of meat and fat, being careful not to overwhelm the grinder, and making sure to handle the meat as little as possible. Even the warmth from a gloved hand can cause smearing if handled too much. Some sausages require multiple grinds with different sized dies, but typically once all of the meat mix is through the grinder you can return the mix to refrigeration to rest and keep cold.
5. Whipping- This step is probably the most important as far as the texture of the finished product is concerned. At this stage the meat mix needs to be thoroughly combined, preferably in a mixer (again to keep cold), or by hand. It is important to only whip the mixture until it is fully combined and becomes “tacky”. Over whipping the sausage will cause the lean meat to get tough and separate itself from the fat during the cooking process, this is called breaking or snapping, and pretty much means the batch is ruined. During this stage any liquid flavoring agents will be added in the beginning of the process (for the chorizo, that is red wine) as well as any binders or emulsifiers. Binders and emulsifiers are ingredients that don’t add flavor, but help keep the sausage from breaking, and help with finished texture. In the case of the chorizo recipe, this is the milk powder’s job. Once the mixture is well mixed and tacky, it can be returned to refrigeration to remain cold while the next steps are prepared. During this step is when you can begin tasting the batch, this can be done by cooking off a small piece of the mixture to check for flavor and seasoning. After making sure the flavor, texture, and seasoning is where it should be, you can move ahead to stuffing.
6. Stuffing- In this step the meat mixture is filled into casings before resting and cooking. Casings can be either natural or synthetic, natural casings are typically edible and remain on the sausage through the entire process. Synthetic casings are usually made from cellulose or collagen and are removed before eating. Natural casings are made from the sub mucosa of an animal’s intestines (sounds gnarly I know, but use the whole animal remember?). They can be from cows (large), pigs (medium), and sheep (small). Other natural casings can include beef bungs, and even bladders, these are not edible and are removed before eating. The stuffing process, just like the other steps, requires the equipment and meat to be cold. The meat goes into a hopper and is packed down to remove as much air as possible from the hopper, air build up will introduce air into the casing and could cause the casing to blow out. At the bottom of the hopper is a horn where the meat will come out of the stuffer. The casings, after being washed and soaked in water for a while, will be slid over the end of the of the horn and a knot is tied to mark the end of the casing. The stuffer has a hand crank or motorized plunger with a gasket that fits inside the hopper air tight and forces the meat down, out of the horn, and into casing. The plunger has an air release valve on it which allows excess air to escape the hopper and not end
up in the casing. When stuffing, one hand is used to control the speed at which the meat is being forced into the casing while the other hand guides the sausage from the horn and helps distribute the meat evenly in the casing. It is very important that the casings are soaked in water and the horn is lubricated with water as well to help prevent rips in the casing from friction. Once the casing is full, the sausage needs to be poked with a small needle or “teased”. Teasing allows any air trapped in the casing escape when the links are formed. Once the entire length of sausage is teased, the other end is tied off and the coil can be linked. To form links, you grab a length of the sausage with both hands, one at each end, and spin the sausage away from you 4-5 times. You then move up the length to the next link and spin that link back towards you. Alternating directions while linking prevents the links from unraveling. Once the entire coil is linked, the sausages need to rest (overnight preferably, but at least a few hours) so that the casings can partially dry and the meat mixture has a chance to rest after being squeezed into the casings, rested meat is tender meat and tender meat is happy.
7. Cooking and eating- When cooking sausage it is important to cook it over the correct heat. Too cold and it will take too long to cook and can cause the fat to melt before the meat cooks which can break the mixture. Too hot and the meat will swell and put too much pressure on the casing and explode. If grilling or searing in a pan, it is usually a good idea to poach the sausages first in hot water or stock, this will limit the amount of time the sausage needs over direct high heat. If serving hot they should be allowed to rest for about 5 minutes after cooking for the moisture to redistribute, if serving cold they should be fully cooled and then sliced.
Having Fun with Fair trade!
 This week, our Front End Supervisor Holly taught us about Fair Trade!
What is Fair Trade you ask??!?!?
Fair trade is an arrangement designed to help producers in growing countries achieve sustainable and equitable trade relationships. Members of the fair trade movement add the payment of higher prices to exporters, as well as improved social and environmental standards.
Individual products or ingredients are certified, not brands/companies.
How does FT work economically?
There are minimum prices set for products. For example, coffee prices are quite volatile in the regular market running from $0.20 per pound to $1 per pound. This makes it difficult for farmers to adequately and appropriately pay their staff. With FT, their wages are stable.
Along with a minimum price for the company to purchase that product/ingredient, there is a FT premium. This is an extra sum of money sent to that farmer to use for community projects and development.
There are 3rd party Fair Trade certifiers who check and audit the farmers and the companies buying the products to use. For farmers and workers, the standards include protection of workers’ rights and the environment, for companies they include the payment of the Fairtrade Minimum Price and an additional Fairtrade Premium to invest in business or community projects of the community’s choice.
Who are the most common certifiers and their certification logos?
Fair Trade International:
Fair Trade USA:
Fair Trade Federation:
Fair Trade America:
What other brands follow FT standards:
Equal Exchange
Alter Eco
What are the most popular items that get FT certified and do we have any?
Chocolate (many! Tony Chocaloney’s, LCC,
Tea (many including Equal Exchange)
Coffee (not too many other than Equal Exchange)
Bananas (Yes! Ours are from Equal Exchange and Fair Trade America certified)
Avocados (Yes! Ours are from Equal Exchange)
Legendary Chicken Parmesan
In this edition of Staff Education, our Chef from Saratoga Jimmy Winslow took us through the intricacies of the HL Chicken Parmesan.
Whats Umami?
The final sense of the palate. Umami is the flavor of “savory”, often found in ferments as well as high intensity flavor items. Mushrooms, beef, cabbage, soy, and fish sauce all have tons of it. Many ingredients such as beef find their umami once cooked… Have you ever bitten into a freshly cooked steak and cant put your finger on what tastes so good? UMAMI! Ever taste your local thai food and wonder why that “fishy” taste is so appealing? UMAMI! The best restaurants around the world have mastered and manipulated this flavor as it keeps guests coming back and that is what we geared to do with our chicken parmesan!
First we start with our umami tomatoes. House marinated and slow roasted tomatoes that make the base for our parmesan. These tomatoes are hand chopped and tossed with fresh tomato product to really bring out the freshness in flavor. We then mix it with a fried garlic and oregano oil to really bring it over the top and unlock all of the umami!
1) Tomato, Roma halved 120 oz
2) Soy Sauce 45 oz
3) Maple Syrup 9 oz
4) Oil, Olive 20 oz
5) Red wine Vinegar 15oz
6)Fennel Seed .1oz
7) Garlic .3oz
8) Basil 1oz
9) Sugar 3oz
10) Coriander seed .1oz
- Remove core and slice tomatoes in half
- Combine the rest of the ingredients and mix well to make a marinade
- Soak the tomatoes in marinade overnight (at least 12 hours)
- Preheat oven to 200F.
- Remove tomatoes from marinade (Save marinade and refrigerate, can be used 3 times) and place on sheet trays with racks. Skin side facing up
- Place in oven and orast low and slow for about 2.5-3.5 hours. The tomatoes should be roasted in color and very dehydrated. Flavor should be sweet and compact.
- Remove tomatoes from pan (Remove skins) and store in cambro. Should form a thick saucy tomato condiment
- Label and store. Make sure marinade is labeled with amount of times used.
Mill some fresh tomatoes into these for a amazing finished sauce and serve it with your favorite pasta or Nonna’s chicken parmesan recipe!